Showing posts with label brownies. Show all posts

Tuesday, May 31, 2011

Bar hopping

There's something about bars.  I know I've expressed my love for this form of baked good before, so it should come as no surprise that I've whipped up a few more batches since.

Uncharted brownie territory...
A few months ago, I was hit with a peanut butter and chocolate craving.  Badly.  As in, a scoop of PB on a spoon and a couple chocolate chips just wouldn't do.  My parents have this new philosophy, which I think is pretty smart: only eat what's in the house already.  So basically, no quick trips out for just one or two ingredients just because you want something; try to make do with what you have on hand.  Cuts down on food spending, food waste, gas to get to the store, etc.  I was raised by some smart people, let me tell ya.

Back to the craving.  In keeping with this philosophy, I wasn't willing to head out and buy some Reese's cups (as Hubs suggested).  Instead, I hit up Allrecipes.com to figure out what I could rustle up.  Behold!


Got a little fancy... I couldn't justify eating the whole pan, so a number came with me to work for a baby shower.
Does a brownie officially become a dainty if it's in a wrapper?  Also, has anyone heard the term "dainty" in this context outside of Manitoba?
I altered the original recipe a touch, adding about 3/4 cup of dark chocolate chips and about 1/3 cup roasted peanuts.  I also followed the advice of a commenter: in order to make these brownie-like, I mixed all the ingredients by hand.  These most definitely kicked the craving!!  They were so easy to make, too, with items I had in my cupboards.  One of my American Sign Language classmates had a birthday yesterday, so I threw together a batch just an hour before I had to leave.  I got to serve them up soft and warm, which took the edge off the misty, chilly evening.


Next up: a personal culinary challenge that I had been meaning to tackle for months:
Oh yes, folks.  They're Nanaimo bars
I really enjoy Nanaimo bars.  I couldn't tell you the first time I ever tried one; I'm pretty sure they've been a favourite since youth.  Up until now, though, I'd never tried making them myself.  Mostly, it was the filling part of the bar that scared me.  What IS that stuff, anyway?  Mostly sugar, sure, but there's got to be more to it.  So once again, I put my trust in Ms. Olson and gave it my best shot with her recipe.  My only modifications?  I replaced the nuts with more chocolate crumbs (not a huge walnut fan), left out the coffee powder, and added some pink food colouring to the filling (since I was making these for a baby girl shower at work).  Pretty delish!

These photos highlight two of the (relatively minor) issues I had with the recipe.  When I was cutting these puppies, the chocolate layer cracked a bit.  Due to the pressure of the knife on the firm chocolate layer, the filling then smushed out the sides.  I tidied them up for serving, but lesson learned: cut these in the pan to avoid squishing as much as possible!
Despite the slicing issues, these were pretty simple overall... after I found custard powder.  Safeway wanted something like $4 for a large can when I only needed a few tablespoons... Bulk Barn to the rescue!  I love that store!  I constantly find fantastic stuff for cake baking and decorating... but more on that another day.

Wondering what bars she'll bake in the coming weeks to stave off wedding jitters,
-Honeybee

Sunday, January 30, 2011

Recipe Exchange!

Cinnamon-y goodness ahead!
 To be completely honest, I usually despise forwarded email "games" and chain letters.  If I don't know who my true friends are just by my interaction with them, I sincerely doubt that asking them to send me back a picture of a kitten professing undying friendship will clarify the matter.  Having said that, there are a few that I enjoy (usually when attempting to procrastinate, as I am now).  One of them is the recipe exchange.


This sounded like fantastic fun to me, and came from one of my coworkers.  ALMOST everyone I sent this to, however, declined to participate.  Most excused themselves on the grounds that they don't use recipes.  My dad sent my coworker his recipe for Kraft Dinner (at least she got a laugh!).  Only a few people gave it a go, but I still got a few yummy new ideas.  One, coming via my dear friend Andrea's mom, was for quick cinnamon buns.  Having spent quite a bit of time on some failure-to-rise sticky buns a few months ago, I appreciated this recipe using more of a baking-soda-leavened biscuit dough base:

Jiffy Cinnamon Rolls
From Barb Hoath (not sure of her original source)

Makes 12 buns 
  • 2 cups flour
  • 2 Tbsp sugar
  • 4 tsp baking powder
  • Dash salt
  • 1/4 cup cold butter
  • 1 cup milk
For Filling:
  • 1/3 cup softened butter
  • 1 cup brown sugar
  • 3 tsp cinnamon
  1. Preheat oven to 400ºF.
  2. "Crumble" butter into the dry ingredients (easier to accomplish with a pastry blender; I had to stick to the two knives technique.  You could try freezing and grating the butter, too)
  3. Add milk and mix all ingredients with a fork. 
  4. Roll out on a floured counter to a rectangle shape about 12" long by 8" width.
  5. Mix softened butter, brown sugar, and cinnamon for filling. Spread this mixture over the dough.
  6. Roll up dough from the 12" side and pinch 'seams'. Cut the rolled dough into 12 individual pieces. Place each piece in a greased muffin tin.  Bake at 400ºF for 20 minutes.
  7. Optional: glaze with 2 tbsp icing sugar mixed with 1 tbsp milk (I opted out of this; they're great on their own!)
Pre-oven... the dough was a bit sticky, but the end result was worth it!
Somewhat surprisingly, I actually received a number of other recipes.  I have yet to try these, so there are no pictures, but I'm happy to share them with you:


Cream Cheese Brownies
Sent by Sheri Moore, originally from 'Cookies and Brownies' by Alice Medrich

Makes about 16 - 2 inch squares.
Brownie Layer:
  • 1/2 cup (113 grams) unsalted butter, cut into pieces
  • 4 ounces (115 grams) unsweetened chocolate, coarsely chopped
  • 1 1/4 cups (250 grams) granulated white sugar
  • 1 teaspoon pure vanilla extract
  • 2 large eggs
  • 1/2 cup (65 grams) all purpose flour
  • 1/4 teaspoon salt 
Cream Cheese Layer:
  • 8 ounces (227 grams) cream cheese, at room temperature
  • 1/3 cup (65 grams) granulated white sugar
  • 1 teaspoon pure vanilla extract
  • 1 large egg
  1. Preheat oven to 325ºF (160ºC) and place the rack in the center of the oven. Have ready a 9 x 9 inch (23 x 23 cm) square baking pan that has been lined with aluminum foil across the bottom and up two opposite sides of the pan.
  2. In a stainless steel (heatproof) bowl placed over a saucepan of simmering water, melt the butter and chocolate. Remove from heat and stir in the sugar and vanilla extract. Add the eggs, one at a time, beating well (with a wooden spoon) after each addition. 
  3. Stir in the flour and salt and beat, with a wooden spoon, until the batter is smooth and glossy and comes away from the sides of the pan (about one minute). 
  4. Remove 1/2 cup of the brownie batter and set it aside. Place the remainder of the brownie batter evenly onto the bottom of the prepared pan.
  5. Then, in the bowl of your food processor (or with a hand mixer), process the cream cheese until smooth. Add the sugar, vanilla, and egg and process just until creamy and smooth. 
  6. Spread the cream cheese filling evenly over the brownie layer. Spoon small dollops of the reserved brownie batter evenly on top of the cream cheese filling. Then with a table knife or wooden skewer, swirl the two batters without fully mixing them.
  7. Bake in the preheated oven for about 25 minutes or until the brownies start to pull away from the sides of the pan and the edges of the brownies are just beginning to brown. Remove from oven and place on a wire rack to cool. 
  8. Refrigerate the brownies until they are firm enough to cut into squares (at least two hours). Once chilled, remove the brownies from the pan by lifting with the ends of the foil and transfer to a cutting board. With a sharp knife, cut into 16 squares. It is a good idea to have a damp cloth nearby to wipe your knife between cuts. 
  9. These brownies can be stored in the refrigerator for several days.

Apple or Rhubarb Cake
From Grandma Mary of the Morris Family

Makes about 9 pieces, judging by how I cut a 9"x9" cake

  • ½  cup butter
  • 1½ cup sugar
  • 1 egg
  • 1 tsp vanilla
  • 2 cups flour
  • 1 tsp baking soda
  • Pinch salt
  • 1 cup sour milk or buttermilk (add a tablespoon of white vinegar or lemon juice to a cup of milk if you don't have buttermilk)
  • 2 cups diced rhubarb or apples (blueberries also work well!)
  1. Preheat oven to 350ºF.
  2. Mix as you would any cake; wet ingredients first, then mix in dry ingredients.  
  3. Fold in apples or rhubarb and place in buttered 9X9 pan.  
  4. Mix ⅓ cup sugar and 1 tsp cinnamon.  Sprinkle on top of cake before baking at 350ºF for 25-30 minutes. 

Roasted Pepper and Goat Cheese Baguette
From the McCormacks (not sure of original source, but I really want to try this!!)

Makes 1 loaf
  • 1 loaf of French bread
  • Goat cheese or Feta (enough to spread over the insides of the loaf on both sides)
  • 1 red pepper
  • 1 yellow pepper
  • Fresh basil leaves ( 1 package should be good)
  • Olive oil
  1. Split bread lengthwise into two long halves.
  2. Cover both sides with cheese and lay basil leaves on top of cheese
  3. Thinly slice peppers and cook the in a skillet with olive oil until tender
  4. Spread sliced peppers inside the loaf
  5. Close loaf and compress; wrap tightly in foil if taking to a party
  6. Slice 1 inch pieces with bread knife and serve!
Ed. note: This sounds delicious; when I make it, though, it'll probably be comprised of actual charred roasted peppers, mixed with sautéed onions and garlic in olive oil.  I would also probably pop the foil wrapped loaf in a 350ºF oven for about 20 min. to heat through before slicing.  But that's just me!

So despite my distaste for email "games", I think I really benefited from this one.  It was a bit strange to be getting emails from people I'd never met before, but I think that just lends more evidence to my belief that food is a universal unifier.

Hoping to share another community food event with you before the weekend is out,
-Honeybee

Sunday, October 24, 2010

Belly Up to the Bar

I've had a few occasions over the past weeks to make various types of bars.  We're not talking the tiki variety with mai tais (though this makes me miss my dear friend Jer), but more the baked-goods variety.  I love bars; they're so versatile, easy to prepare, and are great for making large quantities of treats in one go.  They also give you the option of portion control- just cut them into smaller squares, and you instantly have less fat and sugar per serving! *wink*

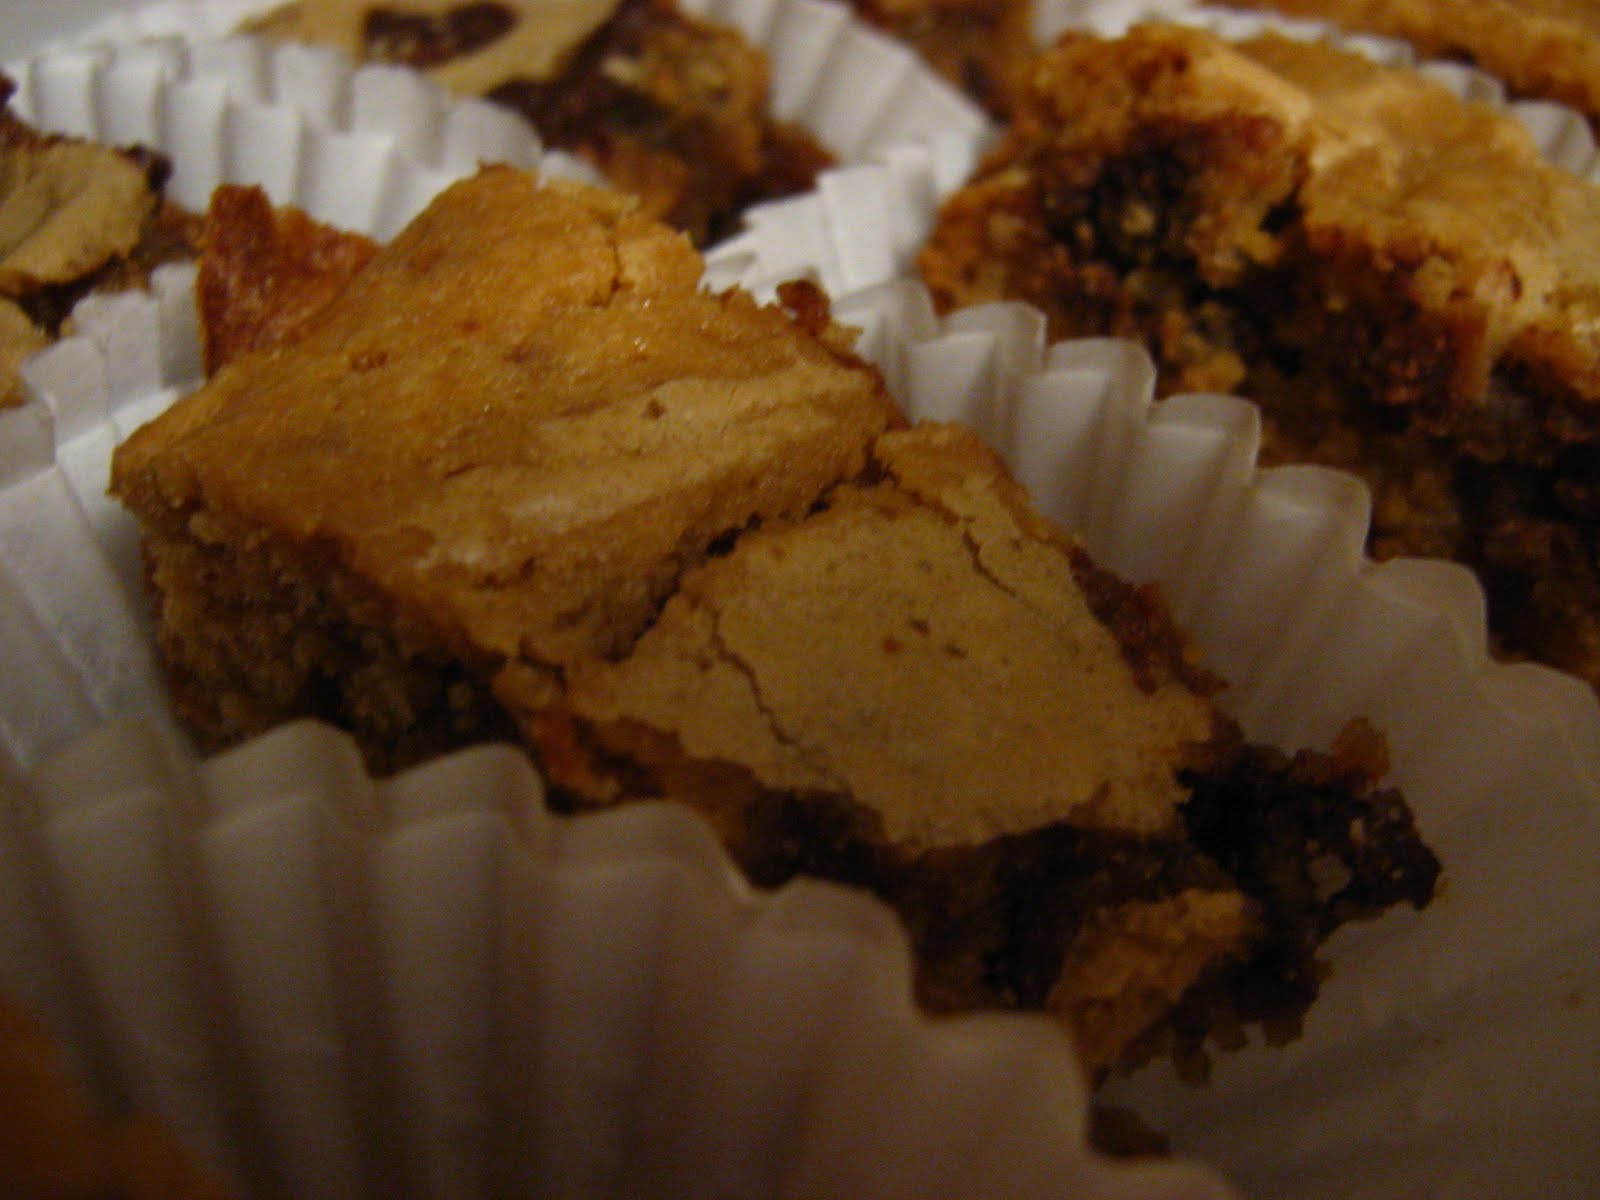
At any rate, first I wanted to revisit a childhood classic with my cousin** Sally's butterscotch brownies.  These would make their way to big family campground picnics, and I liked them so much that I requested the recipe when I was probably 14-15 years old.  These are so easy to throw together, and give you a bit of a different take on the usual brownie fare.  They sort of remind me of a mash-up of chocolate chip cookie flavour with traditional chewy brownie texture... definitely delicious.

**Being a genetic counsellor, my "party trick" is to teach people how they're actually related to their "cousins".  To be absolutely precise, Sally is my first-cousin-once-removed-in-law (that is, the wife of my father's first cousin).  Most people don't understand how the once-removed thing works, and would incorrectly label Sally as my second cousin.  This is not the case.  I shall refer you to Robin L. Bennett's book, "The Practical Guide to the Genetic Family History".  Hubs and I have debated this one to death, and this book was sort of a tie-breaker.
Butterscotch Brownies
From Cousin Sally

Makes 24 brownies (or more, depending on how you slice 'em)
  • 1 1/2 cups lightly packed brown sugar
  • 1/2 cup butter, softened
  • 2 eggs
  • 2 tsp vanilla
  • 1 1/4 cups all purpose flour
  • 1/4 tsp salt
  • 1/2 cup chocolate chips
  1. Preheat oven to 350ºF.
  2. Cream brown sugar and butter together thoroughly; beat in eggs and vanilla until light and fluffy.
  3. Add flour and salt, folding just to combine; stir in chocolate chips.
  4. Spread into an 8-inch square greased pan and bake for 20-25 minutes.
  5. Cool in pan and cut into squares... resist as long as you can before devouring (they continue to cook as they cool).

Look good, don't they?  I'll confess... these didn't make it to the office.  I enjoyed them over the course of a long work-week, with milk and/or coffee and/or tea.  Mmmm.
 Next up, also from the family archives: zucchini fruit bars.  If you've ever lived in Southwestern Ontario, you probably know someone who grows zucchini.  Perhaps multiple people, as in my case (both Nonna and my future mom-in-law have quite the green thumb).  At any rate, it seems like everyone is always looking for ways to use up this summer squash before it goes bad.  As a result, my intelligent future M-I-L, Carla, has quite the repository of zucchini recipes.  This is one of them.


Zucchini Fruit Bars
From Hubs' mom Carla (who doesn't remember where she got it.  I asked.)

Makes about 24 squares, again, depending on how you slice them
  • 3/4 cup margarine
  • 1/2 cup brown sugar
  • 1/4 cup white sugar
  • 2 eggs
  • 1 tsp vanilla
  • 1 3/4 cup flour
  • 1/2 tsp salt
  • 1 tsp baking powder
  • 3/4 cup shredded coconut
  • 3/4 cup chopped dates
  • 3/4 cup raisins
  • 2 cups shredded zucchini (sometimes mom pre-shreds hers, freezes it, and then thaws it out)
  1. Preheat the oven to 375ºF
  2. Cream margarine with the white and brown sugars.  Beat in the eggs and vanilla.
  3. Combine the flour, salt, and baking powder in a separate bowl.  Add to the wet ingredients and mix until just combined.
  4. Stir in the coconut, dates, raisins, and zucchini.
  5. Spread into a greased 9 x 13 inch pan and bake for about 20-25 minutes, or until brown around the edges and a toothpick inserted in the centre comes out clean.
Carla's recipe also includes a glaze that can be poured over the baked bars, but I think they're just fine without it.  If you want to go ahead and add it, mix 1 tbsp margarine, 1 1/2 tbsp milk, 1 tsp vanilla, 1/2 tsp cinnamon, and 1 cup icing sugar until smooth and pour over the partially cooled bars while still in the pan.  You can also sprinkle on chopped nuts if you want.


I brought a batch of these moist, "naked" (i.e. no glaze or nuts) bars to work, and they seemed to be an instant hit.  I think I got more compliments on them than any of my other baking endeavors so far!  Could it be because they had some semblance of healthy ingredients?  Who knows!  At any rate, thanks again to Hubs' mom for sharing the recipe with me!
Last up: the classic favourite, chocolate brownies.  I was asked, as a "voluntold" member of the social committee at work, to bring something "small and sweet" to celebrate a coworker's impending nuptials.  This request came the day before the congratulatory event, on a night when I had American Sign Language class to attend.  Hrm.  A quick mental inventory run-down told me that I had everything needed for these suckers, so I quickly tossed them together, threw them in the oven, and whipped them out in just enough time to get down to the Deaf Centre Manitoba.  Whew! 

 This is apparently Anna Olson's go-to brownie recipe... though I found them to be just a tiny bit too cake-y for my liking.  Two things that could remedy that: a larger pan (for thinner brownies) and less cooking time.  I did approve of my swapping of toasted walnuts (in the original recipe) for chocolate chips... I suppose that makes the double chocolate brownies, no?

Whatever you call them, they were pretty good.  One of the geneticists I work with kept going back for more... I think his total count was five or six.  AND he's thin as a rail.  Jealousy, thy name is Honeybee.
All of these were relatively simple and worked well... but I've been feeling like I need to up my game in the bar department.  For example, I LOVE Nanaimo bars and date squares, but have never had the guts to take a DIY approach to them... I'm thinking that's got to change.

Looking forward to more rectangular treats in the future,
-Honeybee